

POST-OPERATIVE DRAIN CARE
During your procedure, your surgeon may have placed drainage tubes to help sweep away excess fluid produced by the body following surgery. The following instructions will help you care for these drainage tubes until they are ready to be removed.
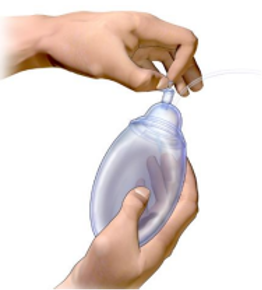
This is what a typical surgical drain looks like.

EMPTYING THE DRAIN
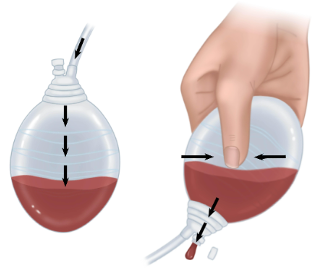
Please empty the drainage bulb one to three times per day. Unplug the drainage bulb (Stopper) to inflate the bulb/ take it off suction. Hold the drainage bulb up to your eye level and take note of the Measurement Marking closest to the fluid level in the bulb. Using these measurement markings, estimate the amount of fluid in the bulb and record the amount of drainage on the Post-Operative Drain Care Patient Ledger chart. Make sure to record each drain separately. If you prefer, empty the fluid from the bulb into a measuring cup for a more accurate measurement.
SHOWERING WITH DRAINS
Please plan to shower once daily beginning two days after your surgery. Remove the outer drainage tube bandages, if any. Do not remove any tape directly over your incisions. Let the warm shower water run over the incision area. Use fragrance-free, regular soap. Rinse thoroughly. Use a clean towel to pat the incision area dry, and then dry the remainder of your body. Please do not attempt to wash or clean out the inside of the drainage bulb or tubes, as this will undoubtedly lead to infection.
Once you have showered, wash your hands with soap and water. Open a package of 4 x 4 gauze pads. Fold one 4 x 4 gauze pad in half. Place the folded square under the drainage tube as it exits the incision. Place another gauze square over the drain tube and tape the bandage. You may use another method if it is easier for you, as long as the drain entry sites are covered.
The drains are ready to be removed when each drain is less than 25 cc in 24 hours for three days. When you reach this point, call the office to set up an appointment for drain removal.